There is nothing I like more than a pair of soft, cozy slippers (unless it's a tall, cold glass of ice water or a pair of new socks). I used this cute pattern to make a pair of slippers for a sweet friend.
The pattern is by Amanda Herring from The Quilted Fish and sadly, I learned as I was writing this post that the pattern doesn't appear to be available any more. (Hopefully there are a few copies floating around the Ebay or Etsy universe.) There are similar patterns out there though, and some of them are free. Yay!
The construction was a little tricky with some curves and tight spaces, but they turned out so cute!
The soles are a soft suede. After a lot of easing and clipping, it all worked out in the end, but the sole pattern seemed a little small for the bootie pattern since there's not much (or any) give to the suede. So, if I were you, I would wait to cut the sole pattern until you have the slipper top constructed. You will thank me later when you get a better fit and don't break out in a sweat trying to make it work! I used paper clips to hold everything together since I didn't want to stick pins in the suede. I'm sure there are better methods out there, but they worked and I had them around the house. Also, my sewing machine and the suede didn't really get along. You might want to think twice about using suede if you make them. I like it because it is more durable than the usual slipper bottom fabric.
You can't see it from the photo, but there is an elastic and button detail on the side of the slippers. I didn't see the elastic measurement in the pattern, so I emailed the designer and she told me that she used a coated hair elastic (like these) Adorable! I used the thinner type since I was already sewing through soooo many layers.
I love the cotton print I used, but unless you are only going to wear your slippers while sitting in your lounge chair, eating bon-bons and watching a romantic comedy, I would recommend using a darker fabric than I did!
What do you call a rabbit with no clothes on? A bare hare.
A while ago I posted a stuffed elephant and trunk I made for my granddaughter's birthday. See here
When another granddaughter wanted a case like here sister's, I remembered Ruby Jean's Closet had a cute bunny too.
Pattern Here
I made Beatrix and the whole kit and caboodle.
When sewing the case, pay careful attention to the application of the interfacing. It's probably the most time-consuming part of the whole process.
The bunny is a made from a quilting cotton with faux suede for the nose and hand patches.
I may or may not have wanted to pull my hair out during the construction process, but I've made four dolls and cases now and little girls love them. They're a great quiet toy they can take with them easily because everything is contained. All the clothes were made from scraps I had on hand, and that is never a bad thing!
A girl can't have too many bags! Right? This Natalie Bucket Bag by ithinksew was the perfect choice for a young friend's thirteenth birthday.
See pattern here
I loved the designer's leather accents, but opted for a darling printed duck fabric from Hobby Lobby. With a 40% off coupon, it was also a great economical choice. The bright pink lining pant-weight fabric I had on hand added a little spunk to the project.
I made the finished bag a backpack rather than going with the designed shoulder strap. That process was easy. The only thing I would do different would be to add a loop at the top for easier hanging.
For the adjustable backpack straps, I used two one inch Dritz D rings and two one inch Dritz slide adjusters. I cut two four by thirty-two inch strips and followed the steps below prior to sewing the lining and bag bottom.
1. Fold both strips in half and press.
2. Open straps and press each side into the center and press.
3. Fold strap in half again and press.
4. Topstitch down both sides of each strap the entire length of the strap.
5. Cut a 4-inch piece from the end of each shoulder strap to attach to the D rings. Thread the backpack straps through the slider adjustments and stitch. Baste the D ring tabs to the bottom corners of the bag. The straps go side by side at the center top of the bag. Baste in place and continue to attach the bag bottom and lining as instructed.
If you decide to make your own Natalie Bucket Bag and have questions about the shoulder strap treatment, ask away. I'd be happy to help!
Why do elephants have trunks? Because they’d look silly with glove compartments.
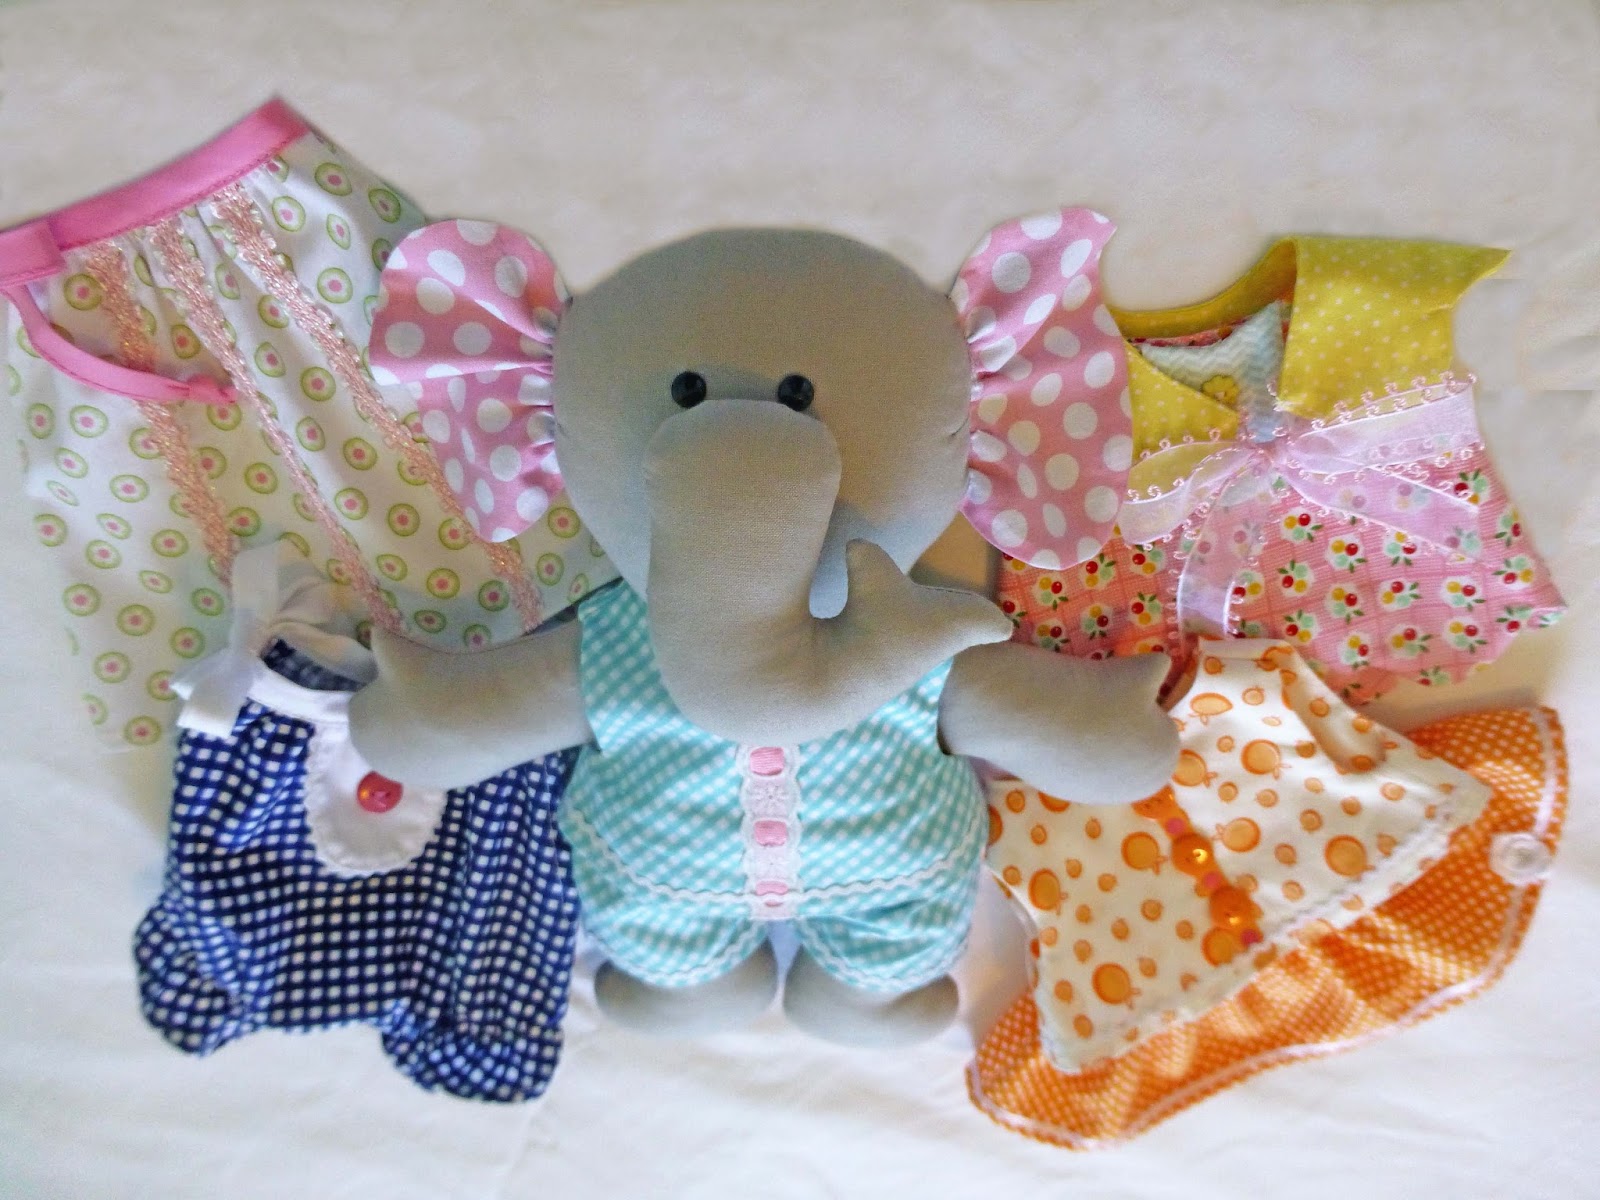
This super-cute stuffed elephant pattern comes with it's own trunk to store all the darling clothes that go with it.
I'm not going to lie, this project took a lot of time. The instructions were good though and it's doable, it just requires patience, (which I am lacking a little when it comes to sewing and life). It's all basic sewing, there are just a lot of steps, especially for the suitcase part. The clothes were a breeze and construction was easy.
Fusible interfacing and I don't always get along. (It has something to do with that patience thing.) It's necessary for this project to ensure the sturdiness of the case. The pattern calls for Pellon Peltex 71, which is ironed on the two main case pieces where the dresser and bed are attached. It's a very stiff craft interfacing.
Pellon Peltex Link
I've never used the product before, but it worked well. The bands around the case require a different fusible interfacing. Make sure to follow the manufacturer's instructions to get a good bond.
I made a few simple adjustments to the pattern. I changed the foot shape of the dresser. I also used a different method for the lamp, lamp shade and window because I didn't like how the case fabric showed through the prints with the applique method specified in the pattern instructions. I traced the pattern piece on a double layer of fabric, right sides together. I sewed on that line, leaving an opening, clipped and trimmed the seams then turned them right side out. After pressing, I stitched using a straight stitch at the pattern placement line.
And here's a little warning because I don't want you to do what I did. The side bands around the case require almost every bit of forty-five inches. I used a quilting cotton, but pre-washed my fabric. It shrunk just enough that I had to piece the side bands. It still worked out, but be aware that you will need the full width of the fabric for these band pieces.
Now, just one more joke since this elephant has such a stylish wardrobe. What do you call an elephant wearing pink earmuffs and a dress? Anything you want. She can’t hear you.
If you're looking for a quick and easy project for all those small scraps you have lying about and making you feel guilty, you've come to the right place!
When I decided to make these stuffed cuties for my grandsons, I found a lot of different tutorials on the internet. Some of them were beautifully hand sewn. I settled on this free tutorial because she gives instructions for machine sewing, which seemed a lot faster to me.
http://andothersillythings.blogspot.com/2011/05/pentagon-colorful-fabric-balls-tutorial.html
I used several different printed cottons and also added some soft minky fabric and corduroy for texture. I stuffed the balls with Morning Glory Cluster Stuff.
As an added bonus, there's a rattle inside. I didn't plan very far ahead, so I found some inexpensive toys from Walmart, cut off their heads, removed the rattles and put them in the balls. (Sorry if that's too graphic:) Since you're probably more organized than I am, you would order them on the internet. I wasn't able to find the rattles at any of the craft stores in my area.
The hexagon size can be increased or decreased to make a bigger or smaller ball. The piece I used measured 4" across at its widest and the finished ball is just the right size for chubby baby hands.
I also made another, pinker version. I hope you have a ball making them like I did!